The alarming increase in food prices has become a concern in my household. It’s forced me to shop for deals, redeem coupons and experiment with cooking on a budget. I have discovered this one fabulous recipe that allows you to make a dish for a family or party of four for under 10€! It utilises canned tuna, which is so accessible here and super budget-friendly. This recipe has a Japanese twist to it that you are going to love. It is healthy, it is easy and makes for a good party.
Ingredients
- 3 cups jasmine rice
- 270 gm canned tuna in vegetable oil
- ⅓ cup Kewpie mayonnaise (or substitute with regular mayo)
- ¼ cup Sriracha sauce (or substitute with chilli sauce)
- 1 tsp Kikkoman soy sauce (or substitute with regular soy)
- 1 tbsp sesame oil
- 1 tbsp white or black sesame seeds
- ¼ spoon chilli flakes or chilli powder
- ¼ spoon black pepper
- ¼ cup chopped spring onions
- 3–4 pieces of Nori (Japanese seaweed)
Instructions
I stick my three cups of rice into my rice cooker (every Asian kitchen has one), and leave it to cook while I prep the tuna.
Discarding as much oil as possible from your can, place tuna into a big bowl, add your Kewpie mayonnaise, Sriracha sauce, Kikkoman soy, and sesame oil, as well as black pepper and chilli flakes, mixing thoroughly. You can always eliminate the chilli if you prefer non-spicy.
Heat your oven up to 200 degrees Celsius. Now the next step is super fun. Let’s begin by layering your cooked rice on the bottom of your tray. (I use a 20x25cm oven tray, but you can opt to use any oven-friendly deep dish that you have at your disposal here.) Press the rice down firmly using a spatula so that it becomes compacted – almost like a rice cake.
Next, add some shredded nori or seaweed and sesame seeds, followed by the tuna mixture, which you will need to spread evenly and to the edges. On top of that, I squeeze some more Sriracha and Kewpie. This goes into the oven for around 15–20 minutes or until you notice the top layer of your tuna starting to brown and crispen slightly.
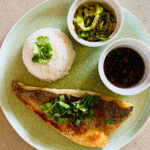
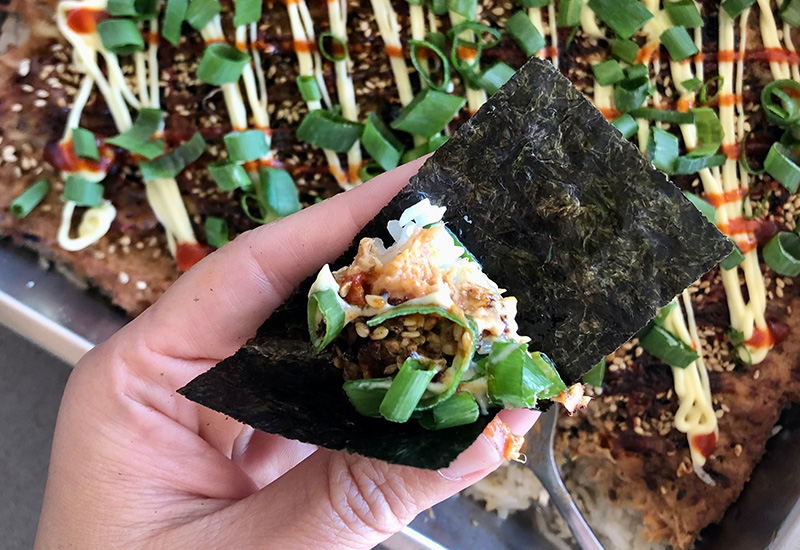
Remove from the oven, spread sesame seeds, shreds of nori, more Kewpie and Sriracha, as well as spring onions and you are ready to serve. You can either serve this as is, scooping out the portion of your choice into your bowl. In our house, we like to scoop it directly into a big piece of nori seaweed and pop it straight into our mouth. Both ways make for a delicious, umami-rich, nutritious meal that doesn’t break the bank and makes everyone happy.
Tuna Trivia
If you didn’t already know, canned tuna contains some serious nutrition in the form of vitamins, namely A, B-complex, and D, as well as iron! It is a healthy food option that is rich in omega-3 fatty acids DHA and EPA and is also low in saturated fat. I also love the fact that it has a long shelf life and I always stock a couple of cans in my pantry for an emergency party. Yes, this is a great party recipe!
Stove Cooking Rice
If you do not have a rice cooker or rice pot, I strongly urge you to invest in one if Asian cooking is your thing. It is convenient and not as time-consuming as cooking rice over the stove. If you must stove-cook your rice, then you will need to carve out some time to keep an eye on it.
First, begin by washing your rice grains to remove any excess starch. You will notice as you rinse the rice that the water will be murky at the first wash and then start to clear up a little bit by the second or third rinse.
Place your rice into a pot roughly triple in size compared to the amount of your rice. In this recipe, you will require three cups of rice and six cups of water.
Place a lid tightly on the pot and bring it to the boil. Once you notice that the water in the pot is boiling, turn down the heat to a very low setting and let it bubble and simmer away slowly for the next 10–15 minutes. After 15 minutes, you can open your pot, inserting a knife down the centre of the pot. If your rice is sticky and wet to the touch, then leave your rice on low heat for another few minutes, allowing it to absorb all the water in the pot.
Check again to be sure using the knife method after a few minutes. Once you are happy with the consistency of the rice, switch it off and leave it to rest for at least another 15 minutes before you begin serving.
Joy Entry is a Malaysian home cook based in Lagos who is obsessed with the provocative, unapologetic flavours of South-East Asian cuisine
Instagram: @thatasianhomecook